Showing posts with label organization. Show all posts

Monday, February 16, 2015

Couponing 101: My Organization System for Coupons and Couponing Sites I Use


Hello!  Today I'm sharing how I organize my coupons and the free couponing sites I use to save big bucks on my groceries, toiletries, cleaning supplies, etc.  First of all, I have a coupon clutch to organize all my coupons.


Essentially, the Coupon Clutch is a cloth cover for your coupon binder with handles and pockets.  Couponclutch.com has everything you need to organize your coupons.  From them, I purchased my 3" binder cover and an array of plastic sheets with different sized pockets for my coupons.  I suggest the Deluxe Coupon Organizer Binder System that comes with 
-8 Tabbed Divider Pages
-3 Plastic Binder Pockets
-10 Nine Pocket Pages 
-10 Eight Pocket Pages
-10 Six Pocket Pages
-10 Three Pocket Pages
-5 Page Instruction Booklet


In addition to the Deluxe System, I bought an extra 8 pack of tabbed dividers and extra plastic coupon pages.  Once my Coupon Clutch arrived, I used my label maker and re-labeled some of the tabbed dividers.  They come with categories already printed on them, and I wanted to change some so I just placed my label over the existing category tab.  I have several categories and subcategories that I use to organize my coupons.

Coupon Categories & Subcategories:

1. Grocery 
-Dairy, Produce, & Refrigerated
-Drinks, Snacks, & Desserts
-Deli, Meat, & Frozen Foods
-Canned Goods, Condiments, & Spices
-Cereal, Pasta, & Boxed Foods
2. Toiletries, etc.
-Personal Care & Beauty
-Pharmacy
3. Cleaning Supplies, etc.
-Cleaning Supplies & Pest Control
-Paper Products & Bags
-Batteries
4. Store Specific Coupons
-Walgreens
-Walmart
-Kmart
-Kroger
-Craft Store Coupons
-Other Store Specific Coupons
5. Other
-Baby Items
-Miscellaneous
-Restaurant Coupons
-Photo Coupons
-Pet Supplies
6. Target Coupons (Target gets its own category because of the sheer number of Target coupons I get and use)
- Target Baby
-Target Food
-Target Beauty & Pharmacy
-Target Cleaning & Paper Products
-Target Other

I find that these categories cover the gamut and I'm able to organize all my coupons so that they're easier to find when I'm out at the store. 


Prior to going to the store, I make a plan of which stores I will go to, what items I will buy, the coupon discount, and how much the item will be after the discount (if I have that information available to me).  I use a spiral notebook and draw columns and write in that information.  I just tuck my spiral notebook into my coupon clutch when I go to the store.


In order to make a plan of how my shopping trip will go, I use a couponing site that gives me all the information I need.  Couponmom.com is my favorite site for this purpose.  Just select the store you want and your state, and a list of coupon deals comes up.  Coupon Mom lists include:
-Date coupon came out
-Which coupon insert it came out of
-Item name, size, description
-If there is a printable coupon for the item, a link will appear in the list
-Coupon amount
-Quantity you need to purchase to get the deal
-The store's sale price 
-Price after coupon savings
-Percent saved


Remember the key to really saving money with coupons is combining the coupons with the store's sale.  In addition, some stores let you stack coupons.  Target is a great example of a store that allows you to stack coupons.  Say I have a manufacturer's coupon for $1.00 off razor blades.  Then, I printed a Target store coupon for $2.00 off the same razor blades.  Plus, Target has the razor blades on sale for $10.00 and they are regularly $13.99.  In addition, the Target Cartwheel app has a coupon for 10% off.  Adding all the discounts together, the $13.99 razor blades can be purchased for $6.00.

$13.99 $10.00 - $1.00 (10%) - $1.00 (Manufacturer's coupon) - $2.00 (Target Coupon) = $6.00


Be sure to check each store's coupon policy to see if they allow stacked coupons or not.  I printed the coupon policies for each of the stores I go to and placed them in my coupon clutch.  That way, if there's any question about policy when I go to checkout, I have the answer right there.  Also, I find that not all store employees are knowledgable about their store's coupon policy and if I have it in writing, I can easily show the employee what the policy says.


There are a lot of couponing sites that will allow you to print coupons to use in the store.  Some are manufacturer's coupons and some are store-specific, so be sure to check the fine print.  I use the following sites the most:


When I get to the store with my coupon binder, I only remove the coupon from its slot once I have the item in my cart.  I keep a small envelope in my coupon clutch to slide my coupons into that I'll be using in that store.  

How do you organize your coupons?  Do you have a system that works for you?  Feel free to share!


Friday, November 22, 2013

My "Master Project List" and a Colorful Free Printable

So, if you are anything like me, you like to take on a lot of projects but don't always finish one thing before starting another.  I'm probably one of the worst offenders when it comes to this!  Part of the problem is that I really get into so many different things and find so many things interesting and fun to do and so at any given time, I could be working on 10-15 different projects, sometimes more!  No joke!  

Having this many projects unfinished in addition to my normal responsibilities could be daunting, but I have a system that seems to work for me and I wanted to share with you!  If you too find yourself starting to crochet that scarf as a gift for your cousin before you've finished your vacation scrapbook, you might be able to benefit from keeping a Master Project List.


Here's a glimpse at my List.  I list the name of the project (duh), what supplies I'll need, websites pertaining to the project and/or inspiration for the project, and then have a section for notes.  In the notes section, I jot down whatever doesn't fit in the other three columns and also number my projects to keep a running tally of how many things I'm tackling at the time.  

So what's on my Master Project List?  A lot! I put all my crafty projects, organization projects, and even more on the master list.  This is my home for everything I spend my time on.  Currently, I have these things on the list:
  • Scrapbooking projects
  • Crochet projects
  • Organization projects
  • Couponing
  • Blogging
  • Smash books & journaling projects
  • Every mini-project related to creating the command center (See this post for more info)
  • Sewing projects
  • Jewelry repair and jewelry-making projects
  • Cross-stitch
  • Holiday gifts & crafts
  • Even credit repair!  (I'm building our credit back up and doing the research on Fair Credit Reporting, etc.  Side note: creditboards.com is an excellent resource for this!)
Basically, if it takes up any of my time and isn't part of my daily routine/responsibilities, it goes on the Master List.  One of the neat things about keeping the list in addition to staying organized and on top of everything, is getting to check things off of the list!  It's pretty cool to see all of the things I've taken on and how many I've been able to check off!

So now that you've seen a peek of my list, why not print your own.  I was in a really good mood when I made this printable which explains why it's so colorful!  Here's the clicky:


Have fun, get organized, and get to checking things off the list!  I'd love for you to share with me.  What types of things are on your Master Project List?

Thursday, November 7, 2013

Family Rules Sign for Command Center


So I have been trying to put together a family command center on one of the walls in our dining room.  I have a bunch of ideas for the command center and have been compiling them for a while and made a list of projects I need to complete before I put them all together on the dining room wall.  You've seen the family command centers, right?  They're all over Pinterest and help the family stay organized.  In case you have yet to lay your peepers on one of these bad boys, allow me to show you a few examples:
 
 
This one can be found over at theyellowcapecod.com.  I love the way they used canvas tote bags labeled with each family members' name hung from hooks to corral loose odds and ends found around the home.  I am using this idea in my command center as well.  I'll be utilizing the totes for separating mail too: the hubs mail in his bag, my stepson's mail in his, etc.
 
 
This chic little number is courtesy of thehandmadehome.net.  The magnetic circular containers are super cute and the use of a rail system like ones found at Pottery Barn and Ikea is really popular for command centers right now. 
 
 
I am really loving the color scheme for this family command center.  Everything coordinates so well, I could stare at this picture for quite a while.  I thought about the possibility of creating my command center in coordinating colors but ended up doing a multitude of colors so my command center is in effect much like my personality, colorful and a little bit all over the place! 
 
 
This is one of my favorite command centers that I pinned for inspiration via One Creative Housewife.  Everything about this center I love: the organization, the mixture of boards and baskets, the printables at the very top; everything is awesome! 
 
So, now that I've shown you what I am aiming for, allow me to share one of my mini-projects with you.  I have seen some command centers that included a copy of the family's rules.  Now, we, as a family, aren't really hell-bent on a lot of strict rules, so I made ours more like "rules to live by".  Your rules could look completely different from mine but here is what I included on our list:

 Be polite, kind, & uplifting
 
Clean up after yourself
 
Support your siblings & share in their joy
 
Be grateful & count your blessings
 
Keep your promises
 
Word hard & do your best
 
Sing silly, dance crazy, hug lots, snuggle often
 
Apologize sincerely & forgive freely
 
Be respectful & dependable
 
Always tell the truth
 
Laugh out loud & have fun
 
Try new things & be creative
 
Listen to your parents
 
Help others
 
Make the right choice
 
Be courageous
 
Believe in yourself
 
 Practice patience
 
Remember you are loved
 
I purchased a 10x20" scrapbooking canvas at Meijer in their craft department a while back.  To make my pretty family rules sign, I typed up my rules, all in different fonts, and all on a separate page of my Word document.  This way, I could use a different sheet of scrapbook paper for every rule to create the hodge podge of designs I have for the rules sign.  
 
I busted out my scrapbook paper and cut 12x12" sheets to 8.5x11' for the printer.  I have a Kodak Hero 9.1 inkjet printer so I had to just place my scrapbook paper upside down in the paper tray in order for it to print on the correct side.  Printers differ in the way they feed paper so if you do a sign, be sure to check this first.
 
After my rules were printed, I cut them into strips.  I just left about a quarter inch above and below the font; I just eyeballed this.  By the way, my font size differed depending on what font I was using anywhere from 50pt to 120pt.  
 
After I had my strips, I just used glue-dots to adhere them to the canvas.  I did this, layering them as I went, a little bit of the top of the next one over the bottom of the last one.  I liked the look that layering gave me.  Because my rules were printed in landscape orientation, they were all 11" long.  I just folded over a half inch on either side of my 10" wide canvas and adhered it with a glue dot.
 
I finished off by using Scotch tape on the back of the canvas to strengthen the bonding of paper to canvas.  The finished product looks like this:
 

Ta da!
 
Feel free to use as many of my rules or as few as you want! Thanks for letting me share!  What would your family rules consist of? 


Monday, July 9, 2012

Family Organizational Binder

I have been trying to become more organized as of late (see menuboard post below).  Via Pinterest, I have found a lot of information on family organizational binders.  So I created one myself!  I think every mom could benefit from getting organized and this binder has helped me accomplish just that!  Here's the binder cover:


Within the binder are a ton of printables I found from various blogs and websites.  For example, here is a printable from a weekly planner that I use:


This particular weekly planner can be found on this site. 

I have divided my family organizational binder with divider tabs (found at any office supply store) and put my printables into the following categories:


1.       Family Info: folders for each person in the family for paper odds  and ends, sizes of each family member, wants and needs lists for each family member,  family goals, family mission statement, etc.

2.       To Do/Calendar/Planner: To Do lists, (daily, weekly, master to do list) calendar and daily planner

3.       Meals and shopping:  weekly and monthly menus, shopping checklists, pantry and freezer inventories, favorite recipes, recipes to try, etc.

4.       Cleaning, chores, and home: Cleaning checklists, chore charts for you and kids, home maintenance list-seasonal, home inventories, DVD/CD/Book library contents

5.       Projects, Crafts, and Blog: Running project list, scrapbook layout ideas, project inspiration, blog topic ideas and blog weekly calendar

6.       Budget and Finances:  Debt snowball, monthly budget, monthly spending tracking list, bills to be paid

7.       Birthdays and Holidays: Party planners, party guest lists, holiday budget sheets, Christmas card list, birthday and anniversary tracker, monthly holiday idea and traditions worksheets

8.       Contacts:  emergency contacts, family address and phone directory, yellow pages for frequently used  business numbers, restaurant and takeout phone numbers and addresses

Feel free to use these categories for your family binder or add your own.  What ever suits you in order to help you get organized!  So, where did I get all these lovely printables for my binder?  I did some research and have found the following sites helpful:

1. For a years worth of checklists on how to get organized go to Creative Organizing.
2. Blog entry about the Life Story Binder at Kim McCrary's Blog.
3. Find suggestions on what to put in your Life Story Binder here.
4. Blog entry about making a family planner at Mrs. Poppin's Blog.
5. Blog entry for Prepared Not Scared Notebook here.
6. Lots and lots of printables from prepared Not Scared here.
7. Lots of printables from Organized Home.
8. Printables from Simple Mom.
9.  Printables from Living Locurto including blog planners here.
10. Blog Topic Organizer from Perideau Designs.
11. Lots of printables from Amy Bayliss.
12. Lots and lots of printables including some for homeschooling parents at Donna Young.

So what are you waiting for?  Get out there and get organized!


Tuesday, May 8, 2012

Craft Room Ideas From Pinterest

I really want a craft room!  With all my craft supplies and being interested in so many different types of crafts, I really could use a space devoted to crafting and creating.  So I searched Pinterest looking for ideas for my craft room, whenever I get a home with an extra room (hopefully soon!). 

This craft room has bright colorful aspects to it, something I'd like for my craft room.


Everycraft room needs an island like this one to not only store supplies, but to use as a workspace.


I really like all the storage in this carft room, so many options!


A craft room with good organization is a must!


Love this craft room, especially the see-through cabinets and chandelier.


This has got to be my favorite craft room idea because I love the decor and color scheme.  The chadelier is so posh, too!


The above two photos are of the same craft room, two different views.  This room has different stations, an idea I'd like to incorporate.


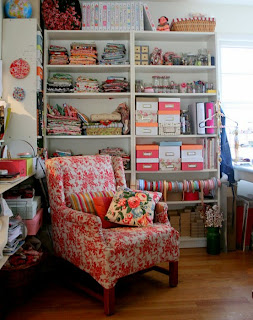
I'd need a pretty chair in my craft room by my book case full of craft books and magazines and would use that area as a reading nook.


This multifunctional craft space is awesome!


The 3 photos above were pinned from tipjunkie.com and are great inspiration for my craft room.


I will have a craft room!


Saturday, May 5, 2012

Craft Storage Ideas From Pinterest

Attention messy crafty people!  If you are anything like me, you have gobs of craft supplies everywhere and no real great storage solutions for it all.  Well, if you are like me, then you get a lot of super ideas from Pinterest on what to make with all these fabulous supplies, but notice there are not as many posts about storage solutions for all said supplies.  I have searched Pinterest looking for such storage solutions and here's what I have come up with.
The picture above is of bead storage from a blogger named Pat Winter in her craft room.


This photo is of a craft cupboard; it's just a pretty armoire decked out for craft supply storage.


These wire shelves are perfect for storing ribbon and small objects in bottles and jars.


This craft room storage wall holds everything neatly in boxes.


I love these staircase shelves with glass jars full of crafty things!


This was a great idea for a DIY Clip It Up scrapbook sticker holder from the Outta This Funk blog.  You can find the tutorial here !


I love how the shelves are covered up with pretty fabric .


This person used IKEA towel racks in her craft room to hang all of her paper punches from.


Here's another good tutorial for a craft paper storage shelf from the Ink It Up blog.  For the directions, click here.


On the right of this photo is this scrapbooker's pegboard display which she uses to hold scrap apapers, stickers, etc.


So, I am getting some good ideas as to what to do with my supplies from Pinterest...stay tuned...more ideas to come!


Monday, March 12, 2012

Menu Board Awesomeness

So I ran across this really cool blog the other day, http://robbygurlscreations.blogspot.com/. Robin of robbygurls is very talented and very organized! She is the original designer of the menu board everyone is pinning on pinterest.com! Robin does a whole tutorial to show you how to make one for your family. You will never have to sit around wondering what the heck you should make for dinner because it has already been decided and the recipe is right there on the board! Also, if you're like Robin and me, you grocery shop for the whole month and then you'll also have all your ingredients ready to make dinner. What could be simpler? Here are a couple of pictures of my completed menu board:


For Robin's tutorial, click here !